My reader Jürgen provided me with a tinkering report from a weekend project in which he and his son equip an older iMac with a pure SSD and dissolve the Fusion Drive that was still active in the iMac.
Chapter in this post:
- 1 Is an SSD noticeably faster than a Fusion Drive?
- 2 SSD via USB 3 port does not make sense
- 3 The “ingredients” for the conversion
- 4 sets of iMac display replacement adhesive strips
- 5 set for iMac 21,5 inch - model A1418
- 6 set for iMac 27 inch - model A1419
- 7 Before the conversion: Backup the Fusion Drive
- 8 let's go!
- 9 Jürgen's conclusion
- 10 Similar posts
Is an SSD noticeably faster than a Fusion Drive?
He recently asked me whether it makes sense to convert an iMac from 2013 that is already running with a Fusion Drive to a pure SSD. My answer was what I would not expect any major speed improvements from this, since the Fusion Drive stores the data that is used most often on the SSD part of the Fusion Drive anyway.
From my point of view, a conversion of Fusion Drive on pure SSD only the advantage that the risk of failure is lower, since you do not bear the risk of two hard drives but only one. The problem with the Fusion Drive is that the failure of one of the two hard drives means that all data can no longer be read - even if they are on the still intact hard drive.
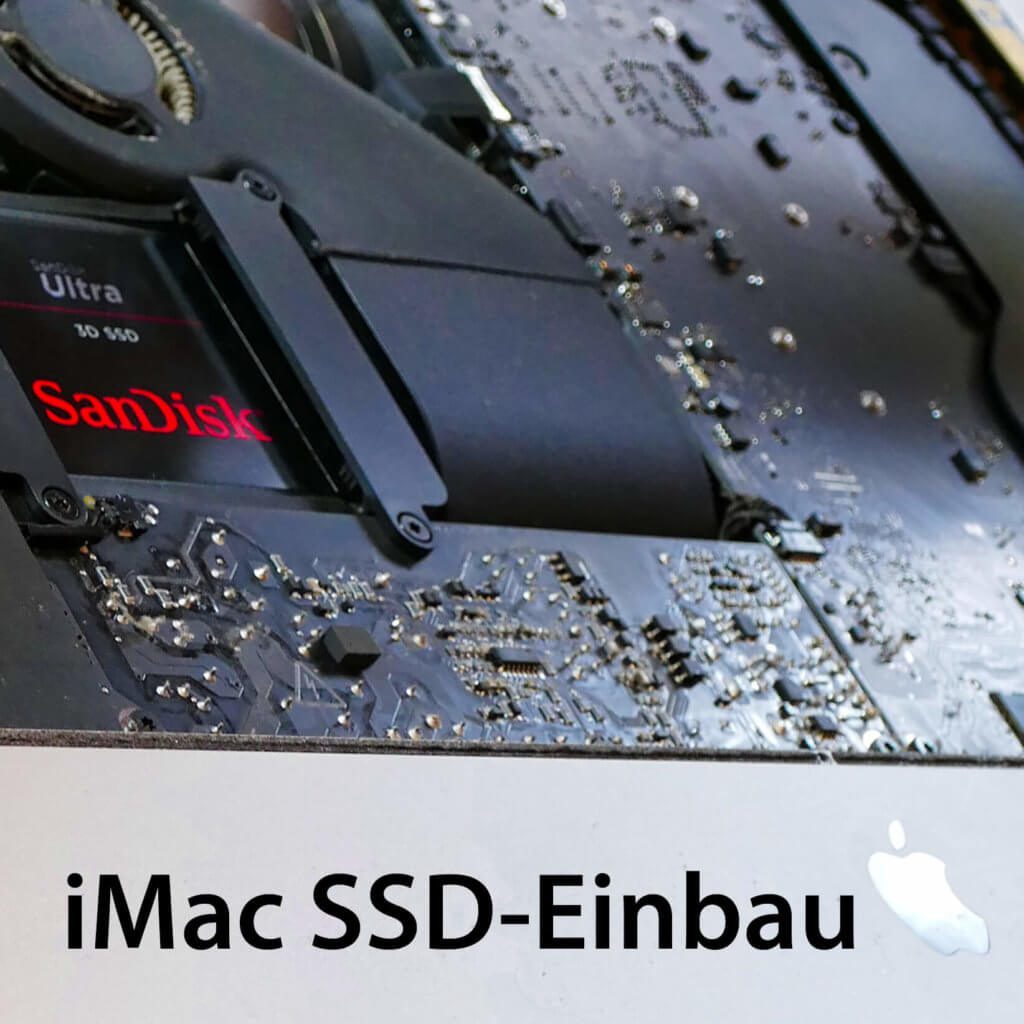
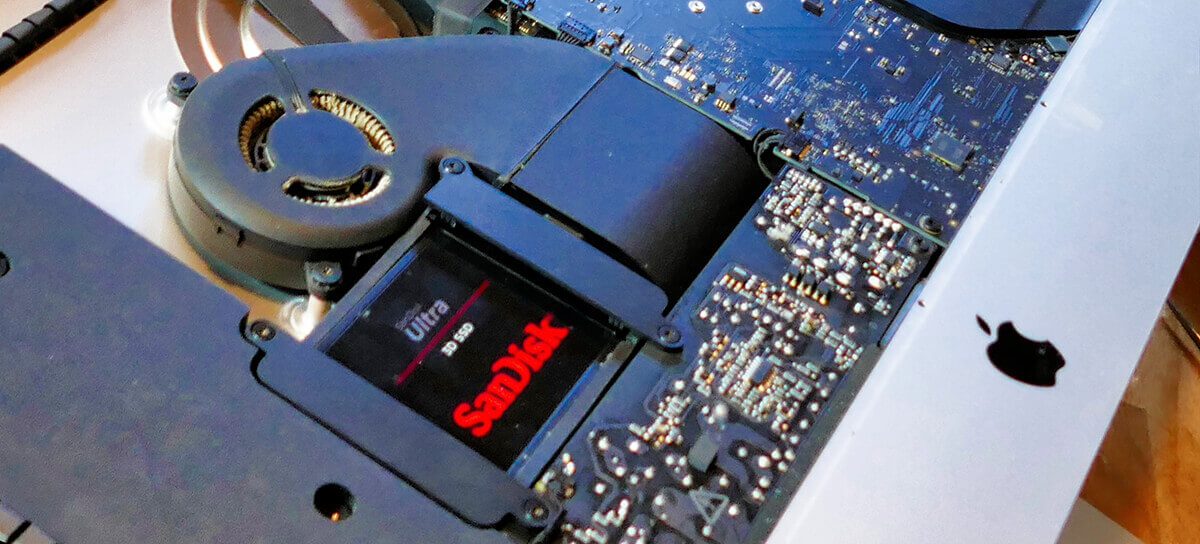
Jürgen decided that he should give his iMac a try and install a SanDisk Ultra 3D SSD with 1 TB of storage. According to him, the speed has noticeably improved again compared to the Fusion Drive.
SSD via USB 3 port does not make sense
Just as a brief note: connecting the hard drive via the USB 3 port, as used by some Mac users who do not want to convert the hardware in their Mac themselves, is not a good idea compared to a built-in Fusion Drive.
The USB 3 port offers a data rate of max. 120 MB / s, which is unfortunately significantly lower than the maximum possible 500 MB / s that a Fusion Drive can offer when it accesses data on the SSD part. The connection via an external hard drive can only make sense with older iMacs that still have a FireWire connection. These usually do not have a Fusion Drive and are significantly faster even with an SSD that is connected externally via the FireWire port.
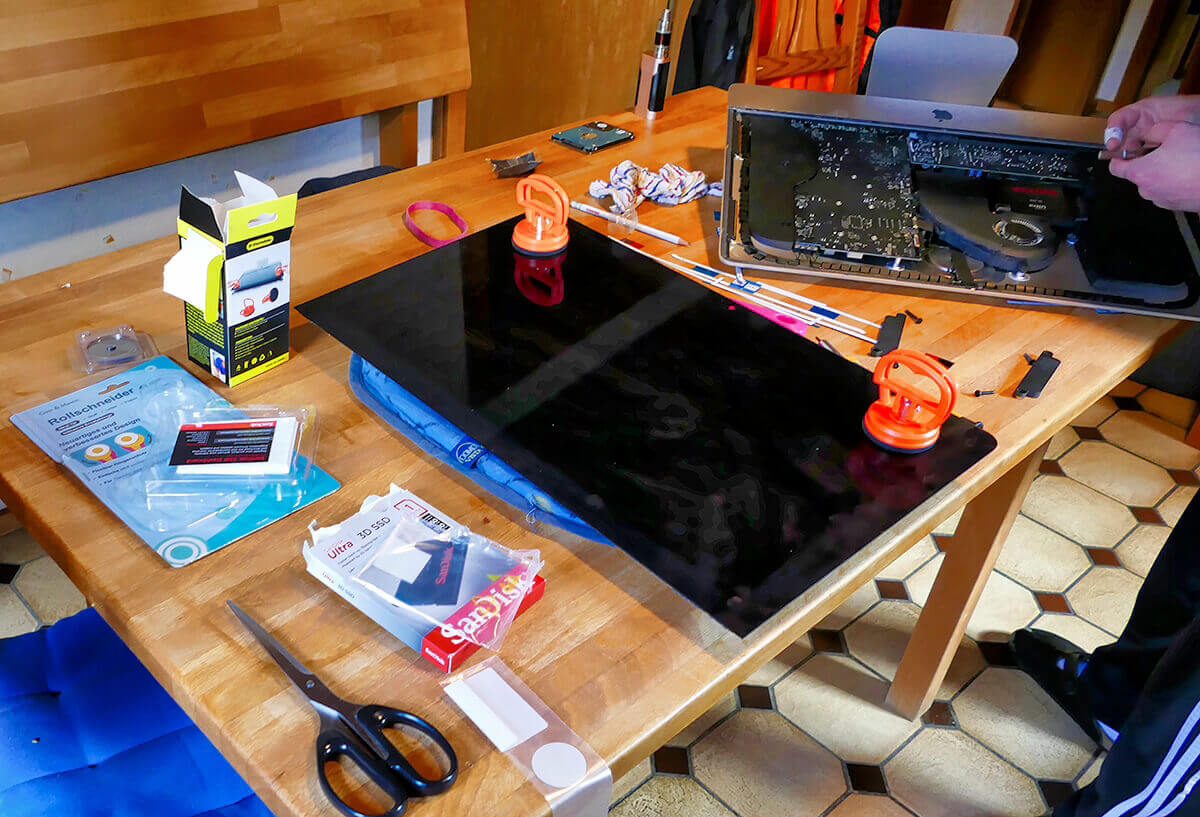
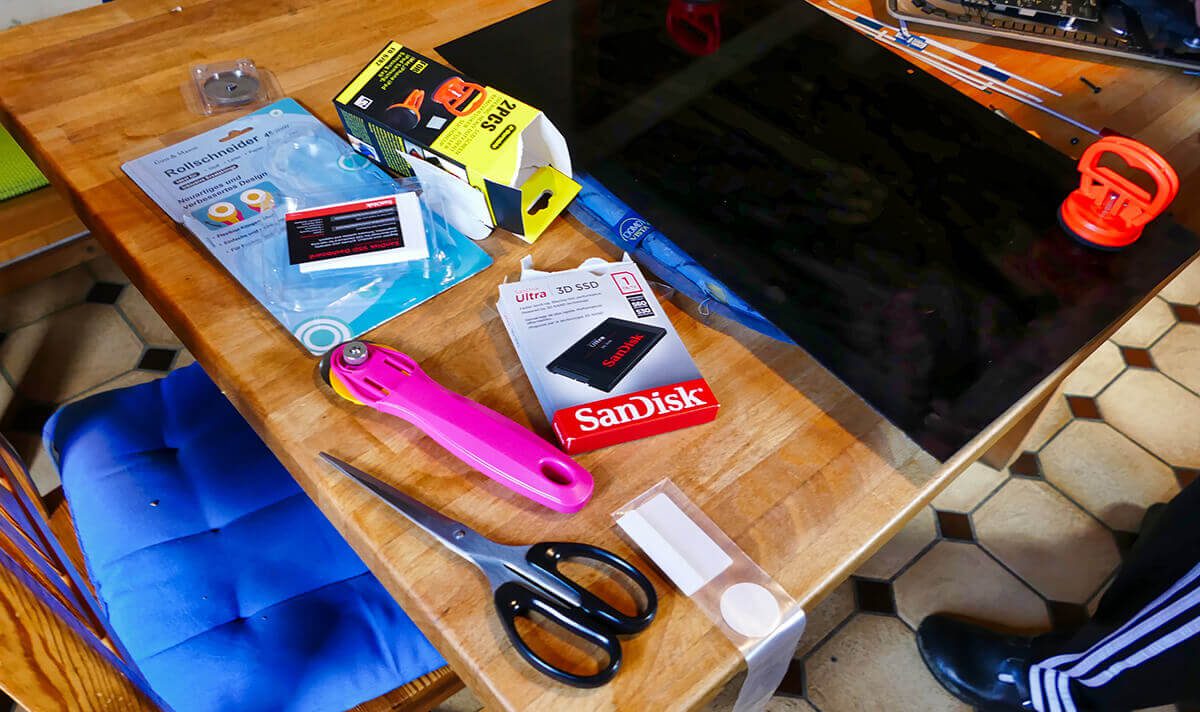
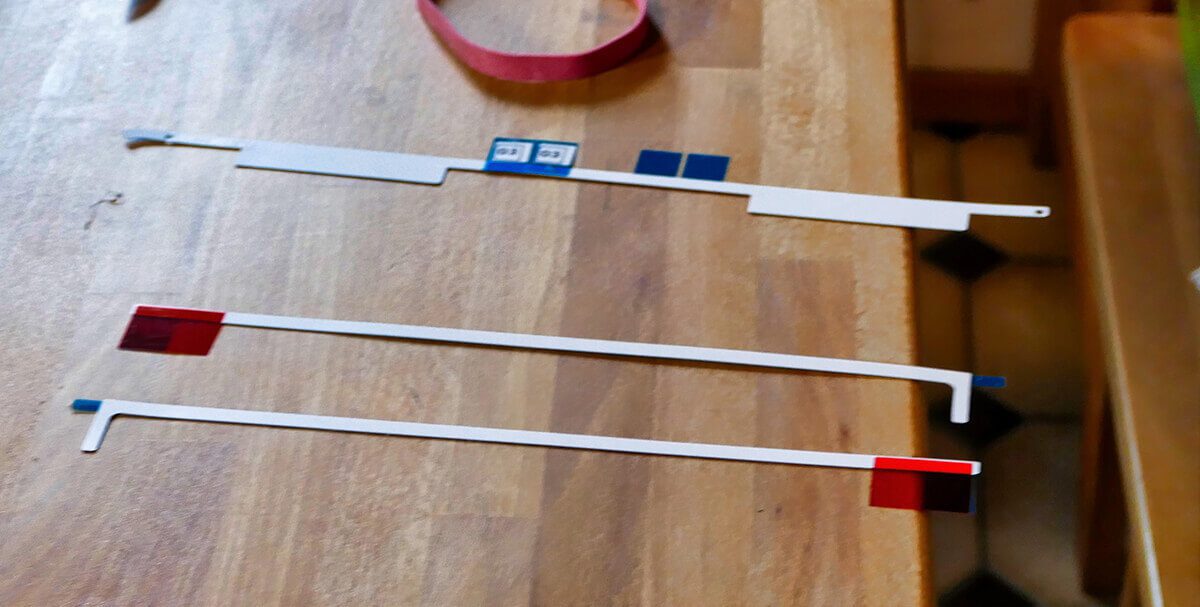
The “ingredients” for the conversion
So that you know what you need for the conversion, I have linked the corresponding equipment and parts here, some of which were also used by Jürgen or which are similar to his. With the adhesive strips for the iMac display, however, you have to make sure that you use those that fit your model or your display size.


iMac display replacement adhesive tape sets
Jürgen bought the adhesive strips from iFixit, but with postage to Germany they are around 20 EUR. The BisLinks sets, which you can get from Amazon Prime without shipping costs, are cheaper. They are also made to measure and fit perfectly. Which set you need depends on the screen size of your Mac. I have listed both sets for you here with the corresponding iMac model numbers:
Set for iMac 21,5 inch - model A1418
These stickers are for the iMacs with the model number A1418 (21,5 inch):
- iMac13,1 Late 2012: MD093LL / A (2.7 GHz Core i5)
- iMac13,1 Late 2012: MD094LL / A (2.9 GHz Core i5)
- iMac13,1 Late 2012: MD094LL / A (3.1 GHz Core i7)
- iMac13,1 Early 2013: ME699LL / A (3.3 GHz Core i3)
- iMac14,3 Late 2013: ME086LL / A (2.7 GHz Core i5)
- iMac14,3 Late 2013: ME087LL / A (2.9 GHz Core i5)
- iMac14,3 Late 2013: ME087LL / A (3.1 GHz Core i7)
- iMac14,4 Mid 2014: MF883LL / A (1.4 GHz Core i5)
- iMac16,1 Late 2015: MK142LL / A (1.6 GHz Core i5)
- iMac16,2 Late 2015: MK442LL / A (2.8 GHz Core i5)
- iMac16,2 Retina 4K Late 2015: MK542LL / A (3.1 GHz Core i5)
- iMac16,2 Retina 4K Late 2015: MK542LL / A (3.3 GHz Core i7)

Set for iMac 27 inch - model A1419
These stickers are for the iMacs with the model number A1419 (27 inch):
- iMac13,2 Late 2012: MD095LL / A (2.9 GHz Core i5)
- iMac13,2 Late 2012: MD096LL / A (3.2 GHz Core i5)
- iMac13,2 Late 2012: MD096LL / A (3.4 GHz Core i7)
- iMac14,2 Late 2013: MD088LL / A (3.2 GHz Core i5)
- iMac14,2 Late 2013: MD089LL / A (3.4 GHz Core i5)
- iMac14,2 Late 2013: MD089LL / A (3.5 GHz Core i7)
- iMac15,1 Retina 5K Late 2014: MF886LL / A (3.5 GHz Core i5)
- iMac15,1 Retina 5K Late 2014: MF886LL / A (4.0 GHz Core i7)
- iMac15,1 Retina 5K Mid 2015: MF885LL / A (3.3 GHz Core i5)
- iMac17,1 Retina 5K Late 2015: MK462LL / A (3.2 GHz Core i5)
- iMac17,1 Retina 5K Late 2015: MK482LL / A (3.3 GHz Core i5)
- iMac17,1 Retina 5K Late 2015: MK482LL / A (4.0 GHz Core i7)

Otherwise you only need a little manual skill, a table with enough space, a soft surface on which you can place the display after it has been removed and a bit of rest.
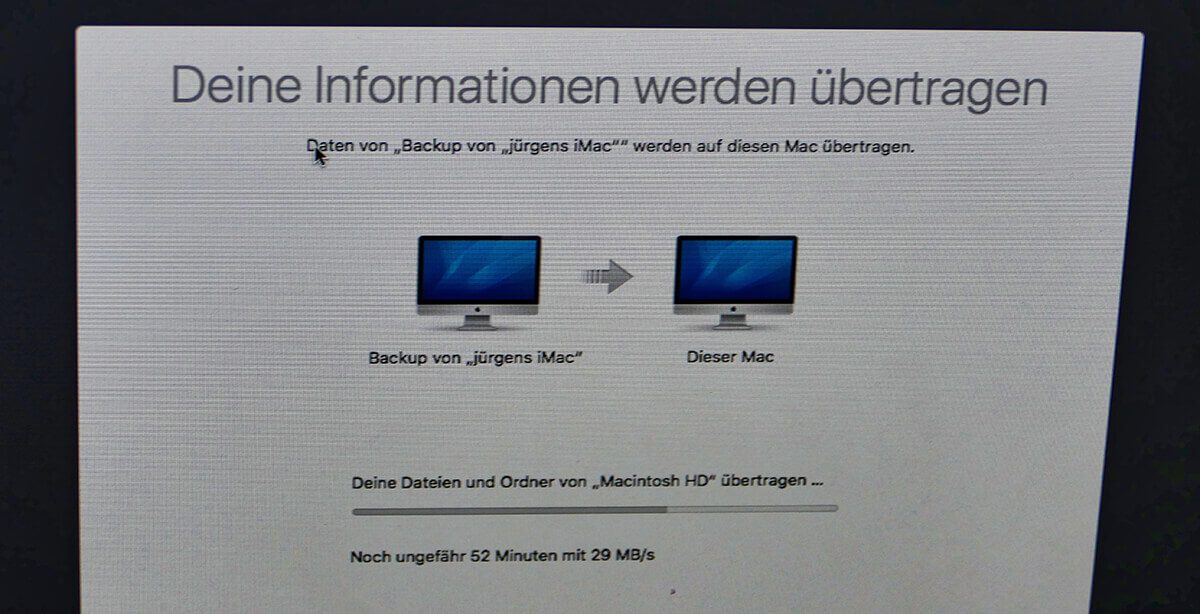
Before the conversion: Backup of the Fusion Drive
Before you start the conversion, you should make a 1: 1 backup of the internal Fusion Drive on an external hard drive. I will explain how it works in detail in a separate article (which I will then link here), but for now the reference to a backup should suffice.
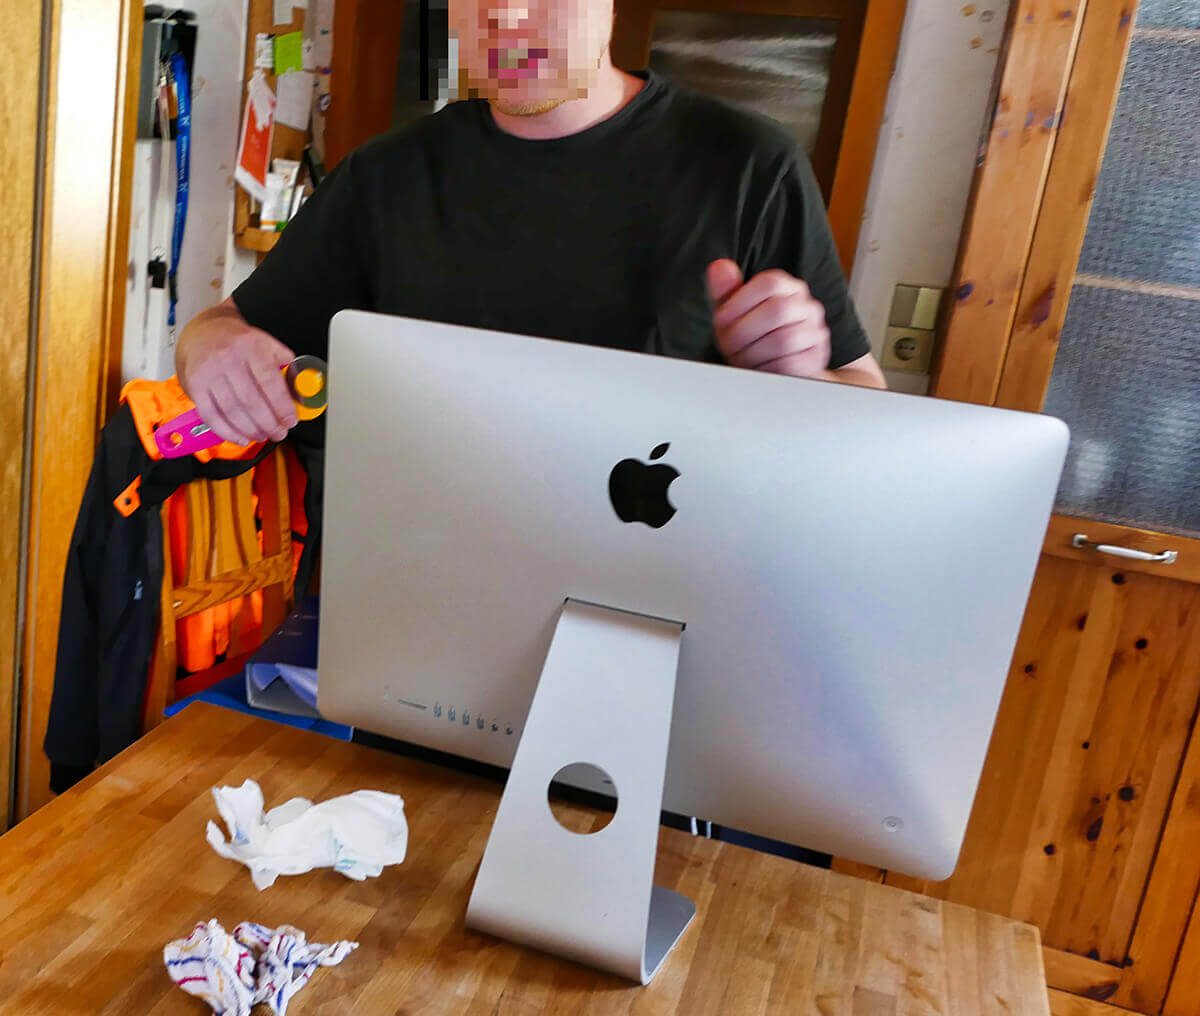
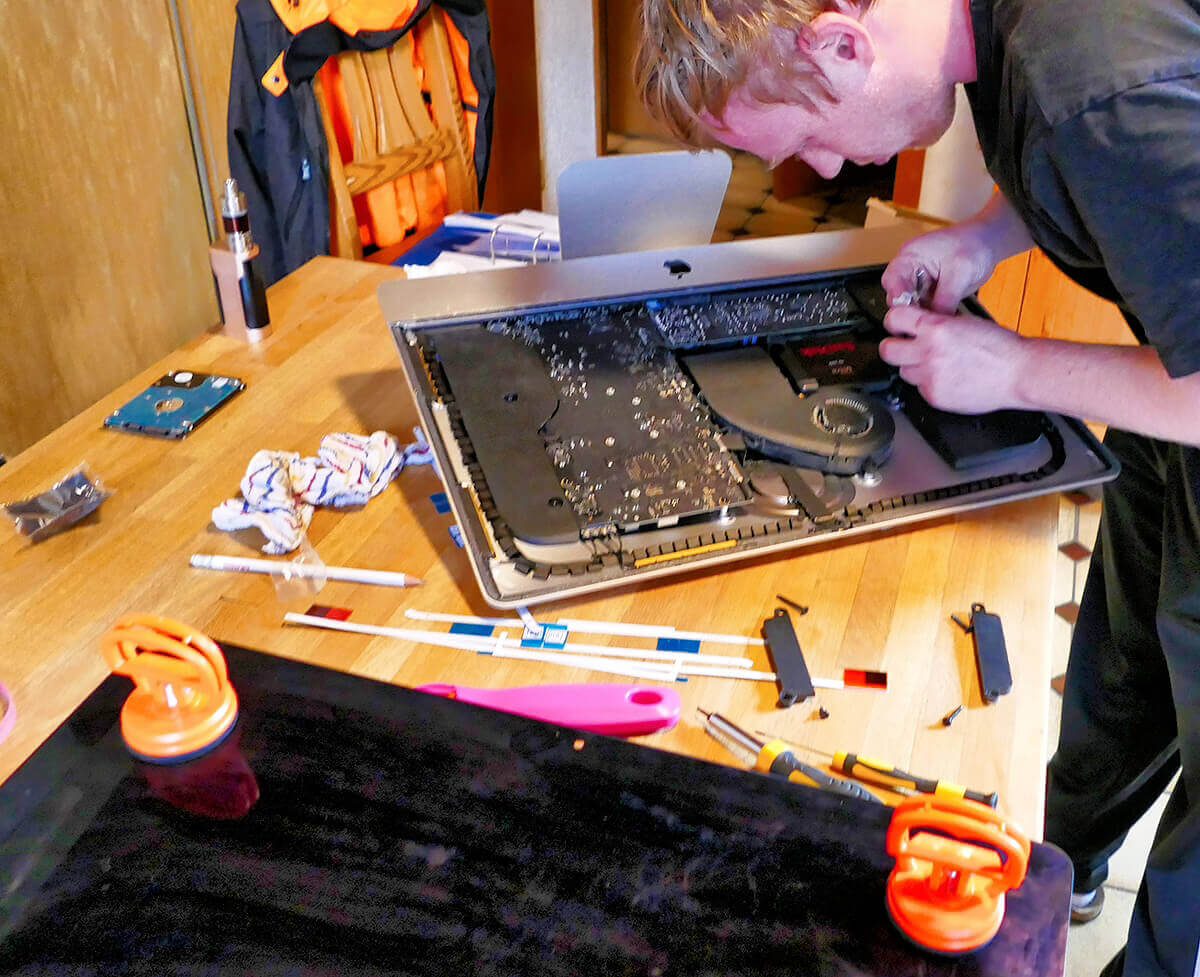
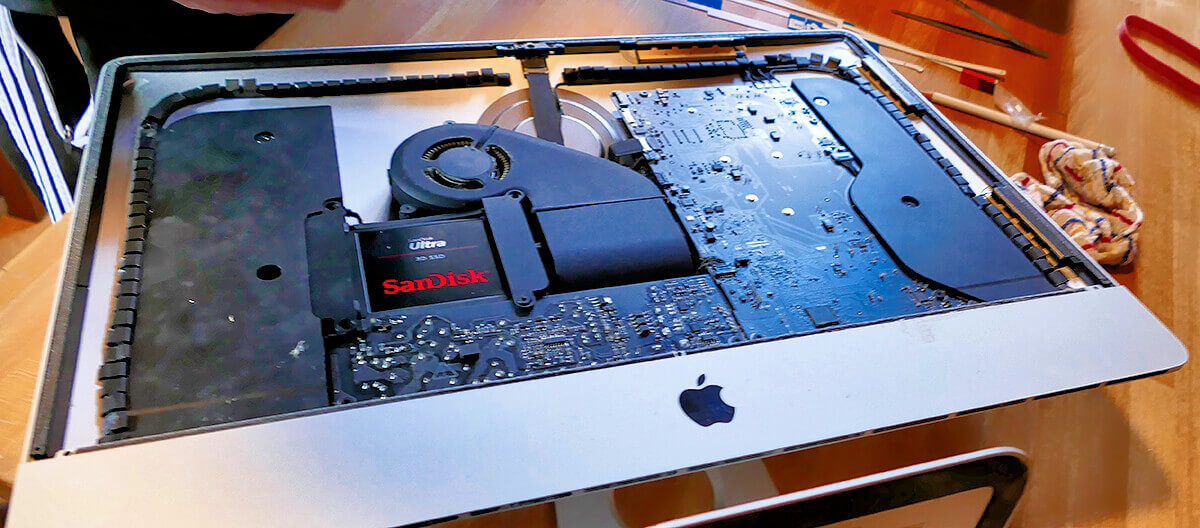
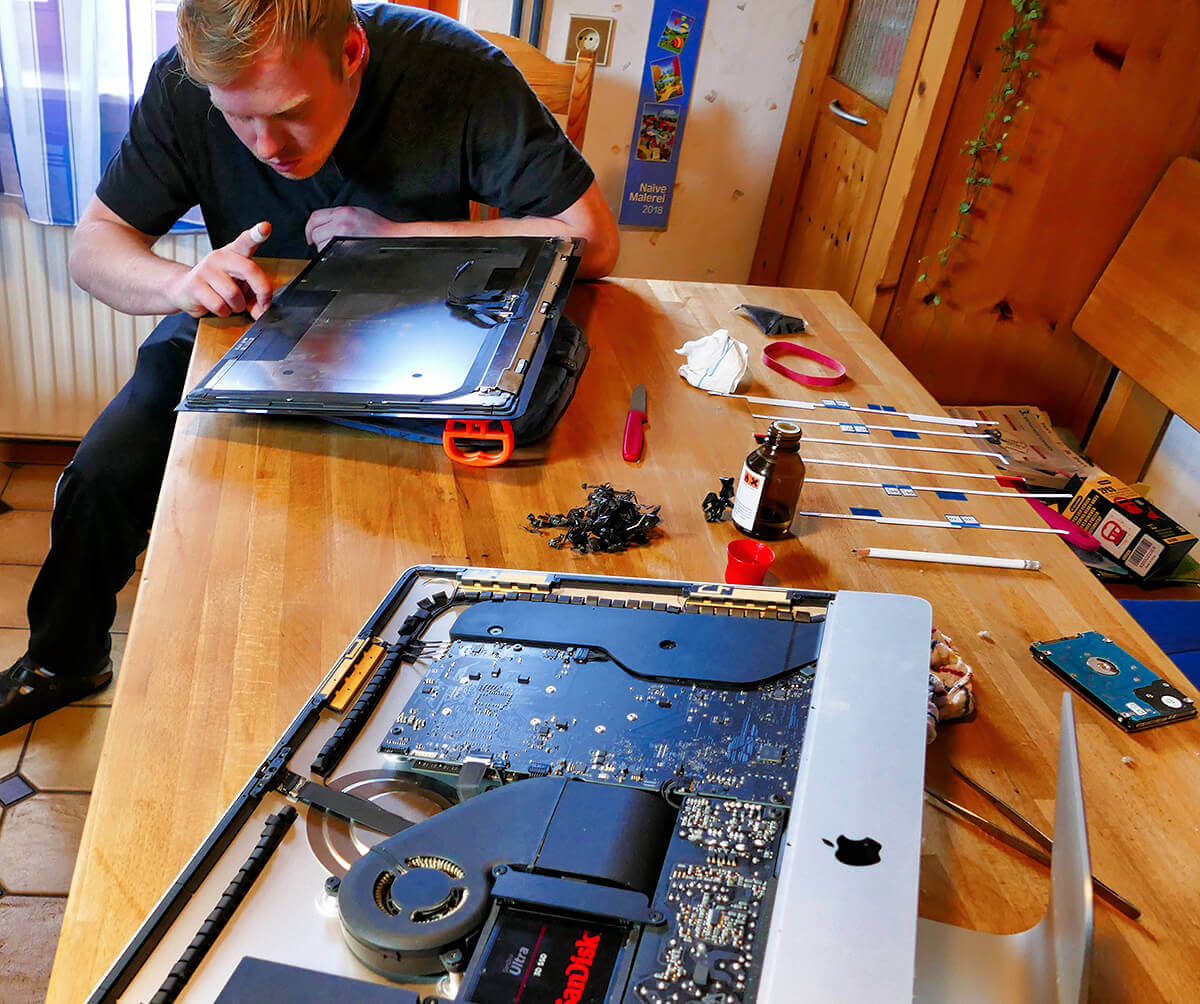
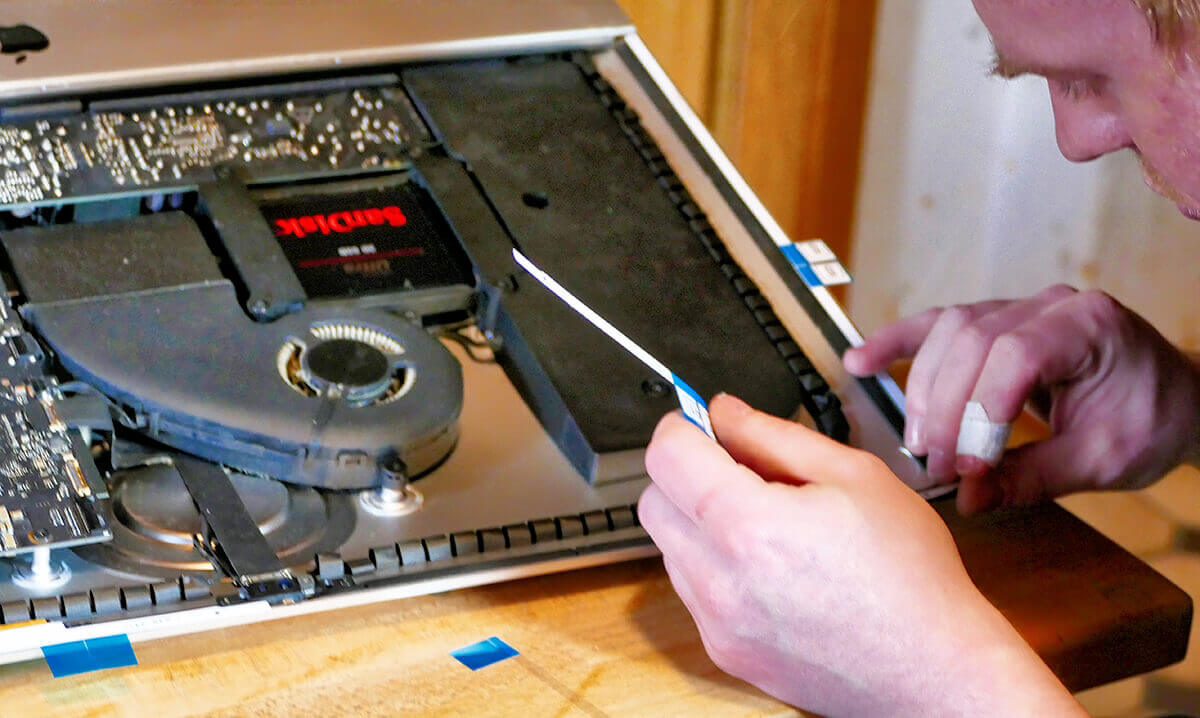
Let's start!
Jürgen kindly sent me a lot of photos and also commented on them. I have edited it a bit and am now including it here as instructions and documentation so that you can see how opening the iMac, installing the SSD, reattaching the display and transferring data to the new hard drive works.
Jürgen's conclusion
The Mac survived the intrusion well and is now much smoother. The costs are around 300 euros with a 1 TB SSD from SanDisk. An investment that is significantly cheaper than a new iMac, but which still brings noticeable improvements in practice.
I thank Jürgen for the many photos and the report! It's great when readers participate in the blog and support me with photos and information. If you have an exciting renovation in mind, just document it and send me the report. Maybe it is interesting for the other readers.
Related Articles
 Which memory card should I use for the GoPro Hero 12 / HERO12 Black?
- Internet Archive – possible uses of the worldwide archive
- YouTube Achievements cards and creator awards - a good motivation for creators
- Apple System Status: Find iCloud outages and issues with other Apple services here
- Mac: Find the AT sign (Klammeraffe) on the keyboard of Apple computers
- What is the difference between a plugin and an add-on?
- What is “dogfooding” in the area of hardware and software development?
- Mobile online casino apps for the iPhone at a glance (sponsor)


Jens has been running the blog since 2012. He acts as Sir Apfelot for his readers and helps them with technical problems. In his spare time he rides electric unicycles, takes photos (preferably with the iPhone, of course), climbs around in the Hessian mountains or hikes with the family. His articles deal with Apple products, news from the world of drones or solutions to current bugs.
The page contains affiliate links / images: Amazon.de
Are all data backed up on the new Mac OS with the migration assistant including all codes of the programs and Outlook files?
Yes, as a rule all license codes and all e-mail data entered, too, of course. You usually only have to re-enter the license code if the program notices a change in the Mac. But if you just change the hard drive, nothing happens.
I would like to finally update my Mac Mini to SSD. The question is simply mirror with CCC and then install or, as described here, reload the system on the SSD and import all data from the time machine backup? They say that every now and then it is good to set up the Mac again, right? Beautiful holiday!!!
Hello Thomas! I always clone the plates with Carbon Copy Cloner (CCC). When importing the data from the Time Machine backup, all the startup objects and the like are also taken over, so that it is not a real "complete reboot". If you want to do that, you would really have to install macOS and then install the necessary programs manually and not use a migration assistant. This actually makes the Mac faster again, but I always refuse. This is so much work that I haven't done it for what feels like 5-6 major MacOS updates. And I have to say: The Mac isn't really slow or anything. Everything works fine. But what I do every now and then: I watch clean my mac through everything that is in the logon objects and services in the system and throw out what is no longer needed.
Thanks for the informative article! A friend of mine owns a Mac device and she didn't want to buy a new one. I think you will be interested in the 300 Euro investment (and a little help from me, of course.;))
Hi, thanks for the info :-) Do I see correctly that he didn't need the temperature sensor? Thanks and Greetings,
Chris
Hi Chris! As a rule, the temperature sensor is not needed. So that it doesn't dangle around in the iMac, it should be reattached somewhere. And if the fans go crazy because they get strange values from the sensor, you can use the app SSD fan control use to “normalize” the RPM. Does that solve your question?
Hi, thanks for your quick reply. Yeah I think that solves my question. One hears different statements: One's fans are going crazy, the other's not. One needs a TemSensor, the other doesn't :-) That is a bit confusing. But, i'll try :-) VG; Chris